For this setup we will use example.com as the domain - please update with the domain you will be setting this up on.
Before you start the configuration process, you will need to email the client with the following details:
---------------EMAIL START-----------------------------
Dear {clientName},
To enable the email parsing solution on your system you will need to carry out the following steps:
1. Signup for an account - http://www.socketlabs.com/signup/
- We recommend choosing the Starter Pack
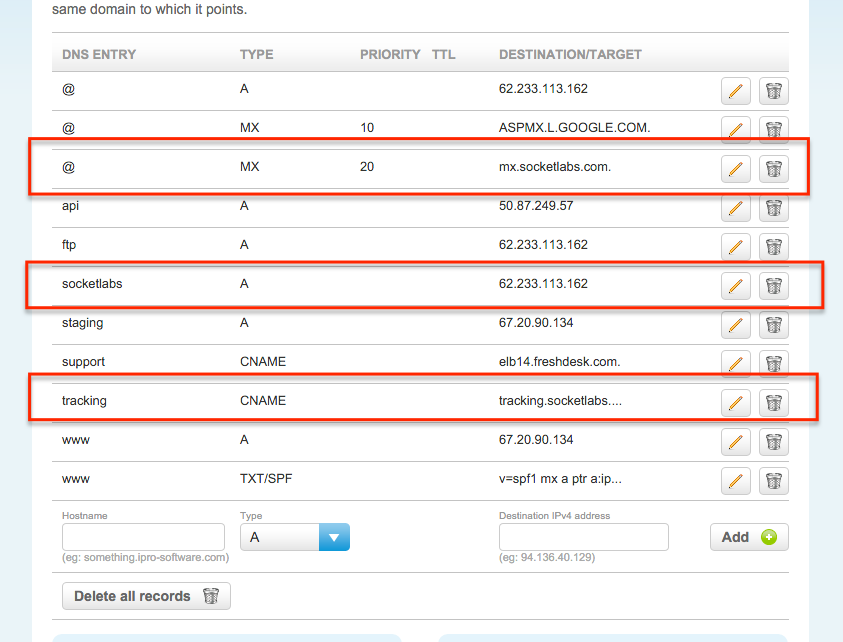
- Create a subdomain inbound i.e. inbound.clientdomain.com, this should point to IP address 62.233.113.162
- Create a MX record for the new domain and point it to mx.socketlabs.com
- Create an A record socketlabs and point to IP address 62.233.113.162
- Create a CNAME record tracking to point to tracking.socketlabs.com
- Please confirm in the email that you have setup the domain in preparation for the connection
If you require any assistance with the configuration of the domain, please feel free to call us or provide us with your login details and we will happily complete this stage for you.
-------------------END--------------------------------------------
Please add the client login details for socketlabs to the following spreadsheet
Please update the Socketlabs Master User Log
Configuring the Server
Please login to IPROPROD1
1. Copy the socketlabs folder from here - C:\PROD\socketlabs-masterfolder

3. Update the file connectionstrings.config - C:\PROD\sites\clientfolder\socketlabs\siteConfig
- initial catalog=clientDBname

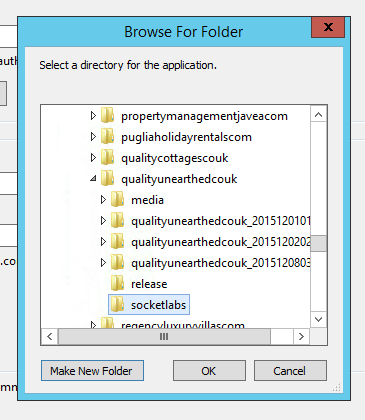
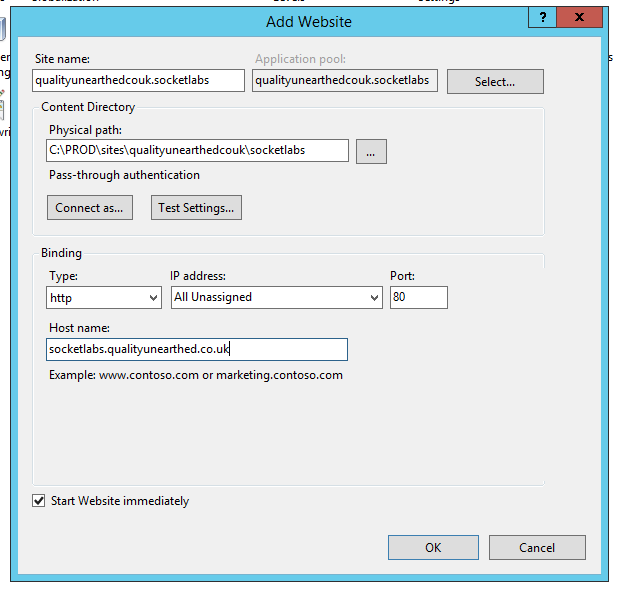
Setup the website within IIS
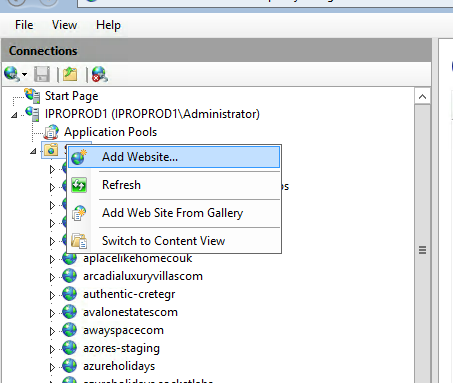
- Set physical path folder as the socketlabs folder
- Set the host header as socketlabs.example.com
Configuring Socketlabs via control panel
1. Log into the socketlabs account, with the details provided by the client
2. Click on the view server button

3. Update SMTP Details
- Go to Configuration
- Go to SMTP Credentials
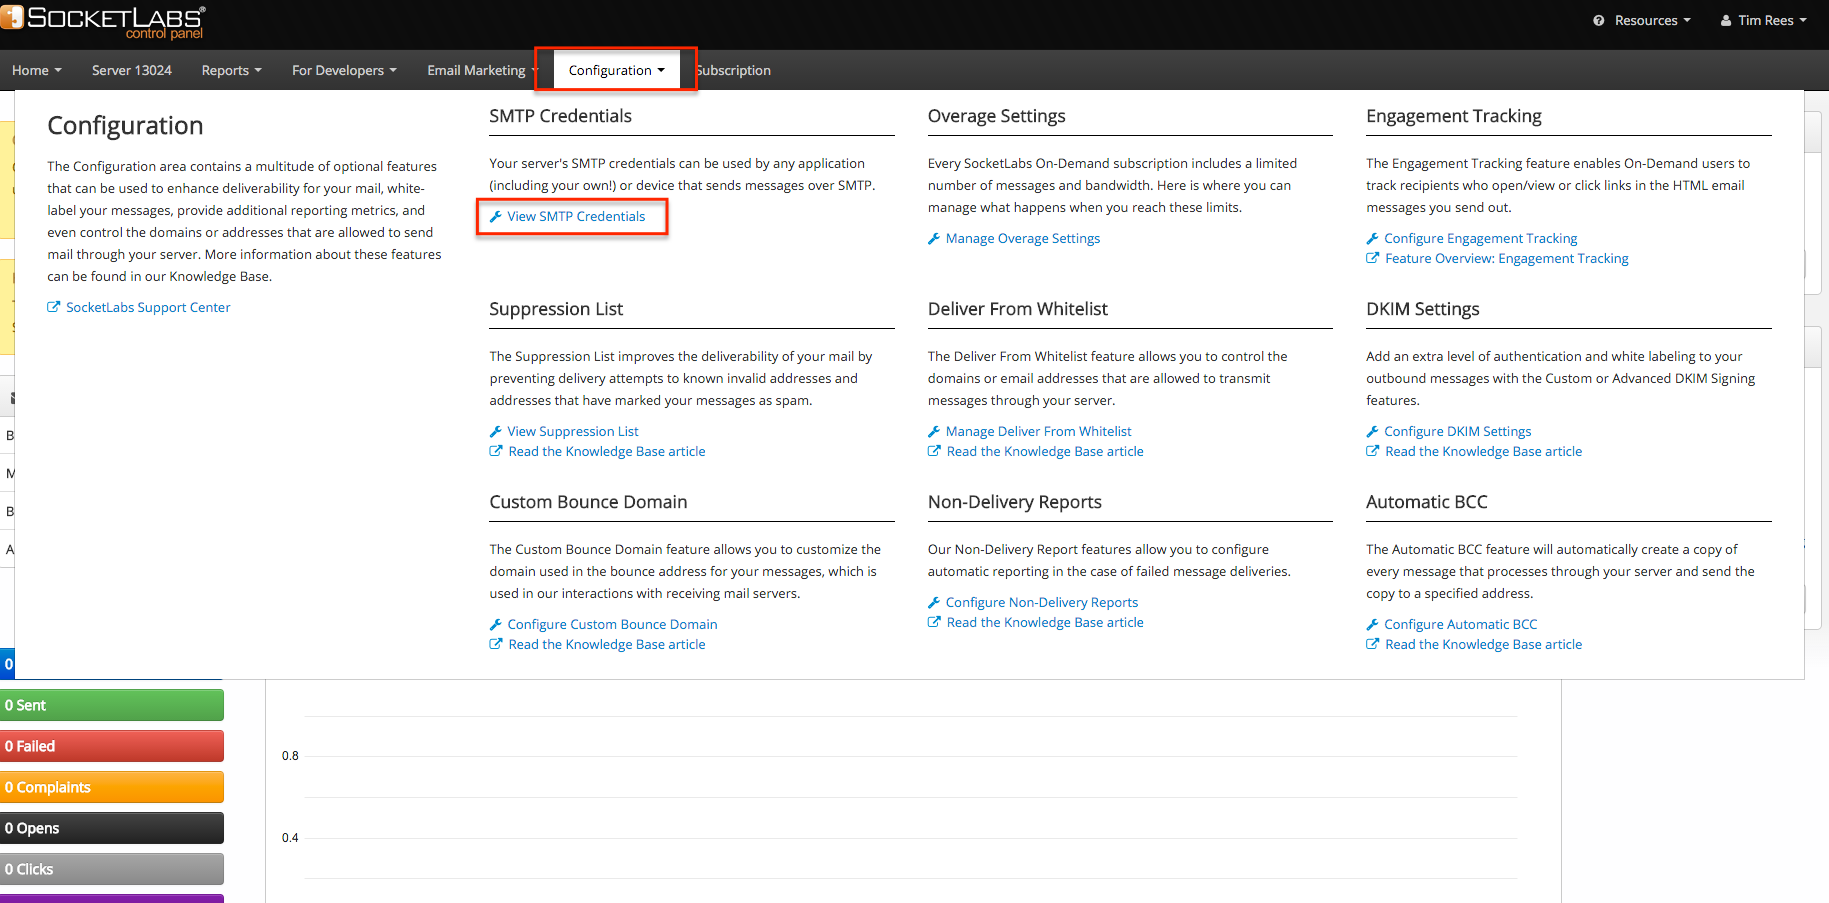
- Update the file smtpSettings.config (C:\PROD\sites\clientfolder\socketlabs\siteConfig) with the details from the SMTP Credentials tab in socketlabs control panel.
- Update default email address
- Update username i.e SMTP Username - server13024
- Update password i.e. SMTP Password - i9B8Akj6FEx42C
- Save the file
4. Setup Inbound API
- Go to For developers
- Go to Configure Inbound API

- Enable it and enter http://socketlabs.example.com/Inbound as the endpoint url
- Update the file appSettings.config - (C:\PROD\sites\clientfolder\socketlabs\siteConfig)
- Secret Key
- Validation Key
- Update the server ID - <add key="Socketlabs.ServerId" value="12828" />
- Add @inbound.example.com to the list of addresses.

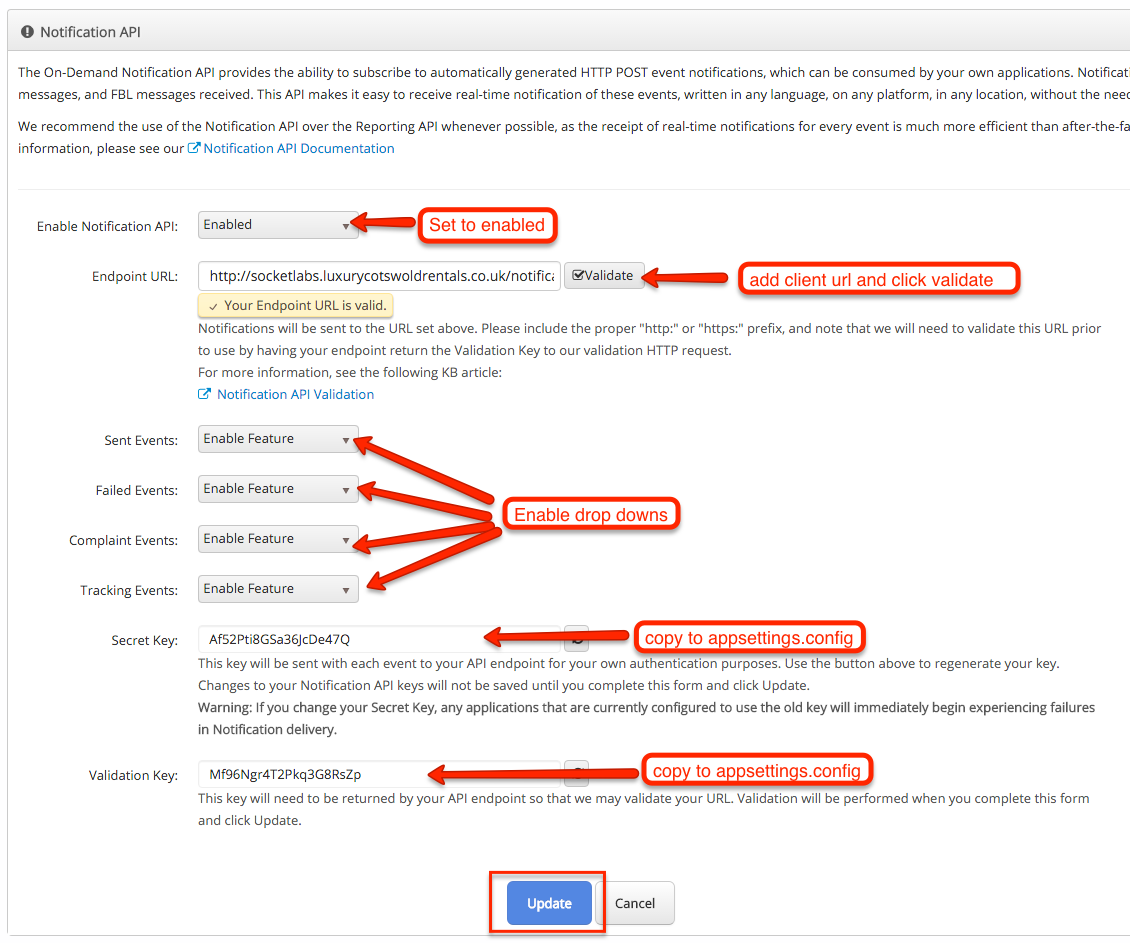
5. Notification API
- Go to For developers
- Go to Configure Notification API
-
Enable notification API
- enter http://socketlabs.example.com/Notifications as the endpoint url
- Enable open and click tracking
- Enable Send events and tracking events
- Replace the secret and validation keys within appsettings.config
- Update the email from settings
<add key="Socketlabs.CompanyEmail" value="reserve@qualitycottages.co.uk" />
<add key="Socketlabs.CompanyEmailName" value="Quality Cottages" />
<add key="Socketlabs.CompanyFromEmail" value="reserve@qualitycottages.co.uk" />
6. Enable Email Parsing with iPro
- Go into umbraco
- Go to Features Configuration
- Set Is Emailing Parsing to On
- Update Email Parse Listener to inbound.example.com

7. Test, Test and test again!
Limitations
The system has 2 limitations.
1. The emails focuses around sending emails to the listener. e.g parse@inbound.example.com. So when a supplier replies to a customer enquiry the reply to field is actually sending the email to parse@inbound.example.com and then parsing this email and then rebuilding this email and forwarding it on. If the customer was to send an email directly to the supplier without replying to a response then the email will not be parsed.
2. Open Notifications work by including a hidden blank image that detects if the email has been opened. Therefore open notifications won't work with people with HTML emails disabled or choose not to download pictures in their emails.
Troubleshooting
If you cannot receive inbound emails you will need to check the following:
1. the inbound app was upgraded but site config not updated
2. the iPro.Dal.dll of the inbound app should the same version of site
Was this article helpful?
That’s Great!
Thank you for your feedback
Sorry! We couldn't be helpful
Thank you for your feedback
Feedback sent
We appreciate your effort and will try to fix the article